Technique
How to Heel Hook: Foot Placement, Hip Position, and Release
Learn how to place, load, and release a heel hook in bouldering without losing body tension, then review your own attempt on video.
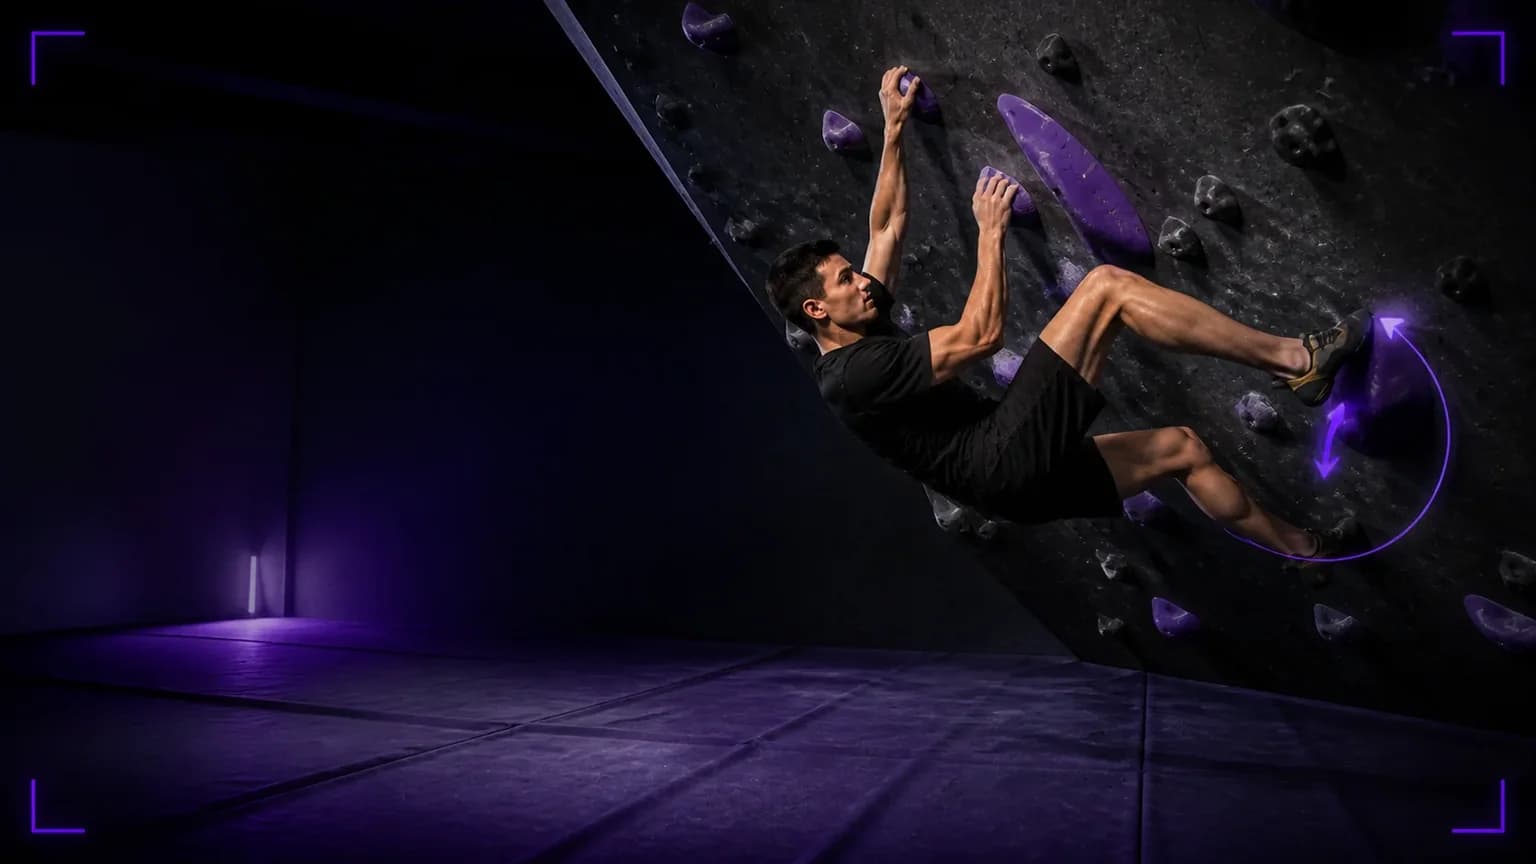
A heel hook turns the back of your climbing shoe into a pulling point. Place the heel on or over a hold, point the toes so the rubber stays engaged, pull through the hamstring, and bring your hips toward the wall. Use it when a foothold sits too high or too far to press with your toe, or when the hook can stop your hips swinging away from the next handhold.
Learn the movement on a low, controlled indoor problem with a clear padded landing. Heel hooks can load the knee and hamstring in unfamiliar positions. Stop if you feel pain, and ask a qualified coach to check a position you cannot control.
Heel hook checkpoints at a glance
| Checkpoint | What to do | Common miss |
|---|---|---|
| Hold choice | Use an edge, lip, or volume that your heel can catch | Hooking a smooth face with no purchase |
| Placement | Put the rubbered heel, not the soft arch, on the hold | Resting the ankle on the hold |
| Toe direction | Turn the toes slightly away from the pull | Letting the toes flop downward |
| Hip position | Pull the hips toward the wall and hooked side | Hanging below the hook with straight hips |
| Load | Increase pressure gradually through the heel | Jerking at full force before the heel settles |
| Release | Unweight, remove, and place the foot deliberately | Letting the heel snap free during the next move |
1. Choose a hold your heel can catch
The best heel-hook hold has a lip, edge, scoop, or positive surface behind which the heel can settle. A large sloping volume may work when the direction of pull keeps your shoe pressed into it. A small flat smear may not.
Read the next move before you commit. Ask what the hook must do: keep your hips close, oppose a handhold, pull you around a corner, or hold your lower body while you reach. That answer determines the useful direction of pressure. A hook that looks secure but pulls away from the line of movement will peel as soon as you move.
The technique guides from Climbing and Lattice Training both treat the heel hook as a whole-body position rather than a foot trick. The hold only gives you an anchor. Your hips and hands decide whether that anchor helps.
2. Place the rubbered heel precisely
Lift the knee high enough to place the heel without scraping the shoe up the wall. Aim the reinforced heel cup at the useful part of the hold. Do not settle the Achilles tendon or ankle bone onto a hard edge.
Once the heel touches, flex the ankle enough to keep rubber on the surface. Many climbers place the heel correctly and then relax the foot. The shoe rolls, the heel cup loses contact, and the hook feels weak even though the hold is good.
Practise the placement without moving your hands. Set the heel, look at the contact, remove it, and repeat. Five quiet placements teach more than one desperate throw.
3. Turn the toes to lock the heel
Toe direction changes how the heel cup meets the hold. In many positions, turning the toes slightly away from the direction of pull rotates more heel rubber onto the surface. The exact angle depends on the hold and your hip position; there is no universal outward angle.
Keep the ankle active. Imagine that you are trying to show the sole of the shoe to the hold while the heel stays planted. If the toes drop and the ankle relaxes, the heel often rolls off before your leg can pull.
Do not force rotation through the knee. Move the hip and foot together, and use a smaller angle when the joint feels twisted. The UIAA safety resources offer current climbing-safety guidance, but no article can judge the load in your individual position.
4. Bring your hips toward the wall
A heel hook works best when the hip on the hooked side moves closer to the wall. That shortens the distance between your center of mass and the anchor, and it lets the leg pull instead of merely hang.
Keep the other foot useful. It may push on a foothold, flag for balance, or hover ready for the next placement. Do not abandon it automatically. A heel hook plus an opposing toe often creates the tension that frees one hand.
If the hook repeatedly slips, pause before blaming shoe rubber. Check whether your hips move away as you reach. Your heel cannot hold a direction that your whole body keeps reversing.
5. Load the hook gradually
First settle the heel. Then pull through the back of the leg while keeping your trunk engaged. Increase pressure smoothly until you can feel whether the hold supports the intended move.
Avoid a sudden maximal tug. A jerk can roll the shoe, shock the knee, or make the rest of your body swing. Build tension before you move the hand. On an overhang, the useful sequence is often heel set, hips in, shoulders organized, then reach.
Your arms still matter. Use the handholds to keep your chest oriented while the heel controls the lower body. If you pull only with the heel and let both shoulders open, the hook may carry more load than the move requires.
6. Move from the hook, not around it
Once the hook feels secure, move your hips first. Pull them along the line the heel created, then let the reaching hand follow. This often turns a long reach into a shorter movement because your center of mass has already travelled.
Watch the knee. It should follow the hip and foot rather than collapsing into a forced twist. On a lip, you may pull the torso over the heel. On a side wall, you may use the hook to resist rotation while you reach across. The visible shape changes, but the principle stays the same: the heel and the target move must share one line of tension.
For more ways to coordinate feet and hips, use the bouldering footwork drills and the overhang climbing guide before you add harder hooks.
7. Release before the hook releases you
Plan the exit while you set the hook. Before you remove it, move weight to your hands and other foot. Reduce the pull through the hamstring, lift the heel clear, then place the foot on its next target.
Do not let the leg snap straight when the heel pops. An uncontrolled release can spin your hips and change the fall. If you cannot unweight the hook, reverse to the last stable position or step down.
Diagnose the common failures
| What you see | Review first | Next attempt |
|---|---|---|
| Heel slides immediately | Contact point and heel rubber | Place deeper behind the lip |
| Heel stays but feels powerless | Hip distance from the wall | Pull the hooked hip inward before reaching |
| Shoe rolls sideways | Toe direction and active ankle | Turn the toes slightly and keep the foot engaged |
| Knee feels twisted | Hip-foot alignment | Reduce rotation or choose another method |
| Heel pops during the hand move | Direction of tension | Move hips along the hook's pull line |
| Body spins on release | Weight transfer | Load the other foot before removing the heel |
Change one checkpoint at a time. If you move the heel, rotate the foot, and change the hand sequence together, you will not know which correction helped.
Use the same review order on each attempt: contact, toe direction, hip distance, load, then release. That repeatable method keeps a visible early error from being confused with the movement that follows it. However, treat any pain as a stop signal rather than a technique problem to film through.
Film one hook and review it in Bouldering AI
Place your phone outside the fall zone at hip or chest height. Use a side-oblique angle that shows the heel contact, knee, hip, both hands, and landing. Record three attempts with the same setup.
Open Bouldering AI and use its recorded-video technique feedback to review foot placement, hip angle, and movement choice. Ask one concrete question: did you bring the hooked hip toward the wall before the reaching hand moved? The app can also keep the attempts beside your project goal and training log, so record the next three tries after one correction instead of relying on memory.
Bouldering AI does not guarantee a send and does not replace a qualified coach. Use the footage to make your next question specific.
A ten-minute heel-hook drill
- Warm up on easy climbing and controlled descents.
- Pick a low problem with a large positive heel hold.
- Place and remove the heel five times without moving a hand.
- Set the hook, bring the hip in, and hold the position for three calm breaths.
- Make three identical attempts at the next hand move.
- Review one clip and choose one checkpoint.
- Repeat three attempts with that single correction.
Finish while each placement remains deliberate. A secure hook you can place, load, and release on command gives you a reusable movement; a desperate heel that works once gives you only one result.
For a broader practice sequence, open the Bouldering AI training guide and place heel-hook work after easier footwork.